
Hello, in this article I will show you how to implement Facebook social login into your web application. Before start, I need to inform you that Facebook login requires definitely SSL/TLS, what I mean is you need to use HTTPS in both in domain and callback URL. Considering this, to try Facebook login locally, we need to expose our local app to ngrok since it is an easy way to apply SSL/TLS on our URLs.
First, we need to handle the Django app side.
Let’s set up the allauth package and create the tables afterward:
pip install django-allauthIn settings.py file, we need to define the necessary settings first. We put allauth and related necessary stuff into INSTALLED_APPS like below. Since we will demonstrate Facebook login putting only 'allauth.socialaccount.providers.facebook', will be enough for us. Then we put SITE_ID and Facebook login settings detail. You can specify the details by looking at the packet documentation.
# Specify the context processors as follows:
TEMPLATES = [
    {
        'BACKEND': 'django.template.backends.django.DjangoTemplates',
        'DIRS': [],
        'APP_DIRS': True,
        'OPTIONS': {
            'context_processors': [
                # Already defined Django-related contexts here

                # `allauth` needs this from django
                'django.template.context_processors.request',
            ],
        },
    },
]

AUTHENTICATION_BACKENDS = [
    ...
    # Needed to login by username in Django admin, regardless of `allauth`
    'django.contrib.auth.backends.ModelBackend',

    # `allauth` specific authentication methods, such as login by e-mail
    'allauth.account.auth_backends.AuthenticationBackend',
    ...
]

INSTALLED_APPS = [
    ...
    # The following apps are required:
    'django.contrib.auth',
    'django.contrib.messages',
    'django.contrib.sites',

    'allauth',
    'allauth.account',
    'allauth.socialaccount',
    # ... here I just enabled facebook provider setting:
    'allauth.socialaccount.providers.facebook',
]

SITE_ID = 1
ACCOUNT_DEFAULT_HTTP_PROTOCOL = 'https'

# Provider specific settings
SOCIALACCOUNT_PROVIDERS = {
    'facebook': {
        'METHOD': 'oauth2',
        'SDK_URL': '//connect.facebook.net/{locale}/sdk.js',
        'SCOPE': ['email', 'public_profile'],
        'AUTH_PARAMS': {'auth_type': 'reauthenticate'},
        'INIT_PARAMS': {'cookie': True},
        'FIELDS': [
            'id',
            'email',
            'name',
            'first_name',
            'last_name',
            'gender',
        ],
        'EXCHANGE_TOKEN': True,
        'VERIFIED_EMAIL': False,
        'VERSION': 'v7.0',
    }
}
You can also define client_id and secret here but we will create this on the Django admin panel.
After that you should include allauth url scope inside your urls.py:
urlpatterns = [
    ...
    path('accounts/', include('allauth.urls')),
    ...
]
We can start the server, expose it to our ngrok and go to Django admin panel to create a Site object.
python manage.py runserver 8080and in another terminal run this:
./ngrok http 8080Now our app has SSL/TLS support, we have an HTTPS link https://e0a2-176-240-192-27.ngrok.io. The first object we need to create is a Site. It’s a Django object, it’s an object of a “sites” framework that resides in Django source code. As stated in the official documentation, a site object just refers to a domain and its name/slug. In the admin panel, when we create a Site object, we need to put that URL into the domain field and give name anything you wanted like “MySite”.
For example, if we would use a real domain like www.example.com. Then we can register a site object with the domain field “www.example.com” and the name field something like “ExampleSite”.

After we created a Site object, we need to be sure that the primary key value of this object should match with the SITE_ID that we defined above in our settings.py; otherwise allauth login will not work properly.
Facebook side settings
Now lets the second part begin. Now login to Facebook and go to developers.facebook.com, (if you don’t have a developer account you will be redirected to create one) and click on “My Apps”. Create an app and add Facebook Login. After creation, again you need to create a test app from this app.

Go into the test app you created.
Here are the next steps you need to do:
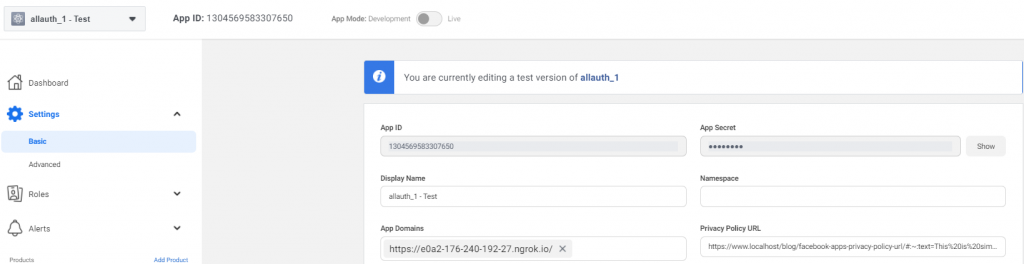
- Go to
Settings->Basictab on the left. - Here you will have
App IDandApp Secret. Copy them and return to Django admin panel. Create a social app (“Social applcations”). Choose provider “facebook”, give a name like “Facebook”, put app id and app secret credentials, choose the site object you created and save. Well done, the Django part is finished now.

- Return to Facebook Panel, on the same page give a display name for the app.
- Put your Privacy Policy URL and Terms of Service URL.
- Copy-paste your domain full link and paste it into “
App domains“. It’ll be like “https://e0a2-176-240-192-27.ngrok.io/“. - Save changes.
Then:
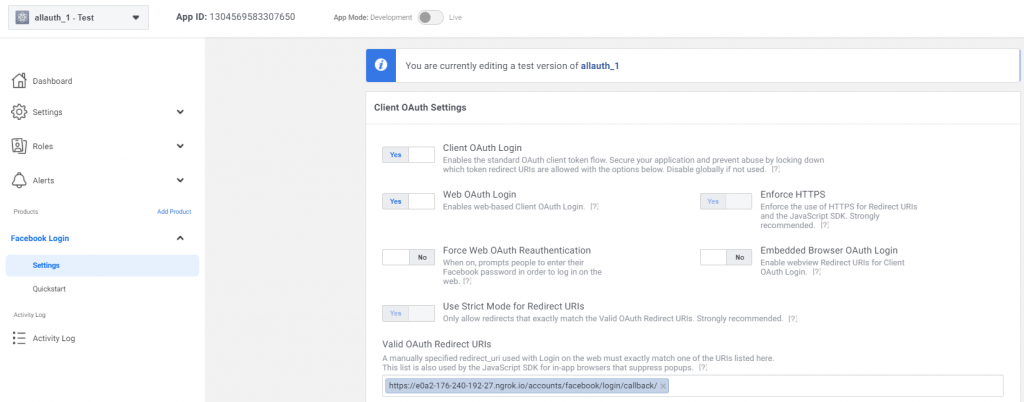
- Go to
Facebook Login->Settingstab on the left. - Put your callback URL. It’ll be like “
https://e0a2-176-240-192-27.ngrok.io/accounts/facebook/login/callback/“. - Save changes.
Now we are ready and we can test our Facebook Login implementation in our app.
Testing our application
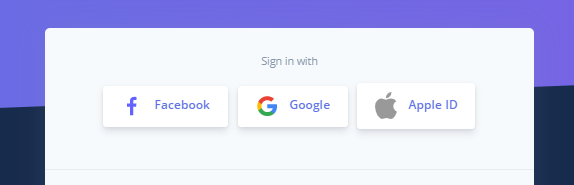
I created a superuser, prepared my login page with a Facebook login button.
Go to your login page. Be sure you used ngrok HTTPS link. My login URL is “https://e0a2-176-240-192-27.ngrok.io/accounts/login/“
Click on your Facebook login button.
It’ll redirect you to Facebook. At this point, if you look at the url, you can see there is a redirect uri.
https://www.facebook.com/login/reauth.php?app_id=1304569583307650
&signed_next=1
&next=https://www.facebook.com/v7.0/dialog/oauth?client_id=1304569583307650
&redirect_uri=https://e0a2-176-240-192-27.ngrok.io/accounts/facebook/login/callback/
&scope=public_profile,email
&response_type=code
&auth_type=reauthenticate
&etc…
The redirect URI here is exactly the same URL that we give to Facebook. To make sure our application created a HTTPS callback URI we put this to settings.py:
ACCOUNT_DEFAULT_HTTP_PROTOCOL = 'https'
After you enter your Facebook password and process, you will be logged in inside your app.
If you don’t put LOGIN_REDIRECT_URL inside your settings.py, it will redirect you to link /accounts/profile/ like mine:
https://e0a2-176-240-192-27.ngrok.io/accounts/profile/
If you put that setting inside your settings.py like below, you will be logged in to your application and it will redirect you to my blog. So you can redirect to anywhere you want with this setting.
LOGIN_REDIRECT_URL = 'https://www.nurettinabaci.org/'